Custom Textures
From GMod Wiki
| This page needs to be edited as it contains information that is unclear or incorrect. Improvement can be discussed on the talk page. Find more pages that need work here. Details: None given. |
How to make custom textures for Gmod
Setup
Step 1: Create a “materials” folder in your garrysmod/garrysmod folder, if it does not already exist.
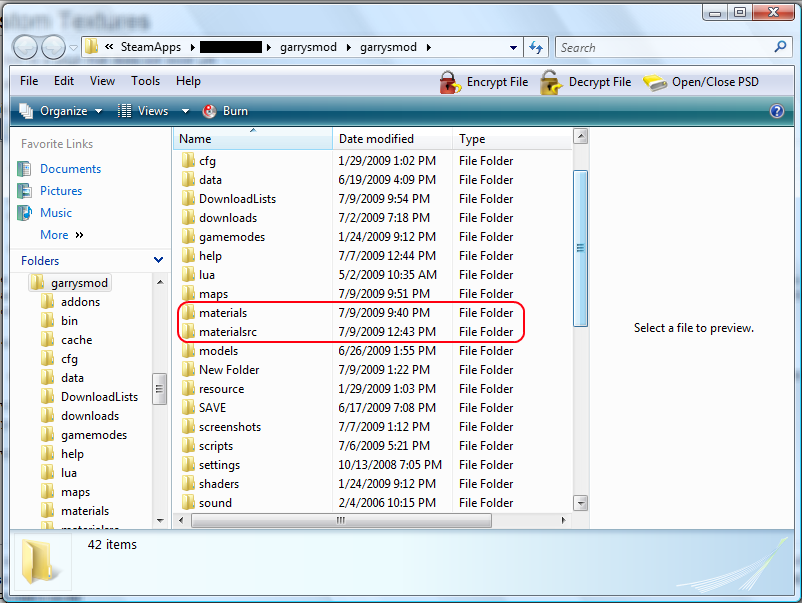
Step 2: Create a folder named the same as the map you are making the texture for in the “materials” folder.
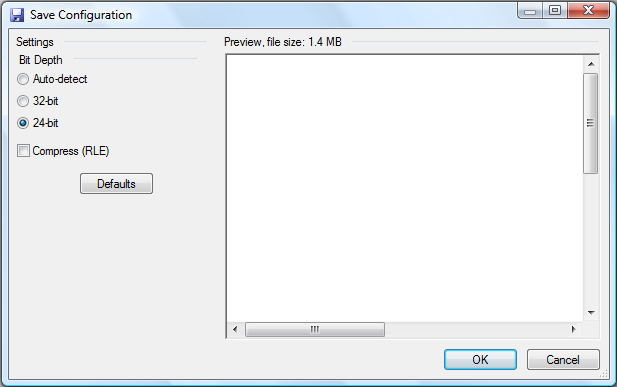
Step 3: Put the texture you want in the garrysmod/garrysmod/materials/mapname folder in Targa format. Photoshop or paint.NET can save an image as a Targa (I am using Paint.NET). When you save the Targa you are prompted with a box like the one below. Choose "24-bit" for the Bit Depth and un-check "Compress (RLE)." (If your texture has transparency or an Alpha-Channel you need to save it in "32-bit.") Before you save make sure you resize the image to 64x64, 128x128, 256x256, 512x512, or 1024x1024. These are sizes accepted by Hammer and Valve in general.
Step 4: Create a blank text file with the same name as your texture name and put it in the garrysmod/garrysmod/materials/mapname folder
Creating the Texture
Step 5: Using VTFEdit or picture editing software with a VTF plug-in turn the Targa into a VTF and put it in the garrysmod/garrysmod/materials/mapname folder. VTFEdit is better because there are more options to choose from. You can get it here http://nemesis.thewavelength.net/index.php?c=178 .
First we need to import our Targa from the garrysmod/garrysmod/materials/mapname folder.
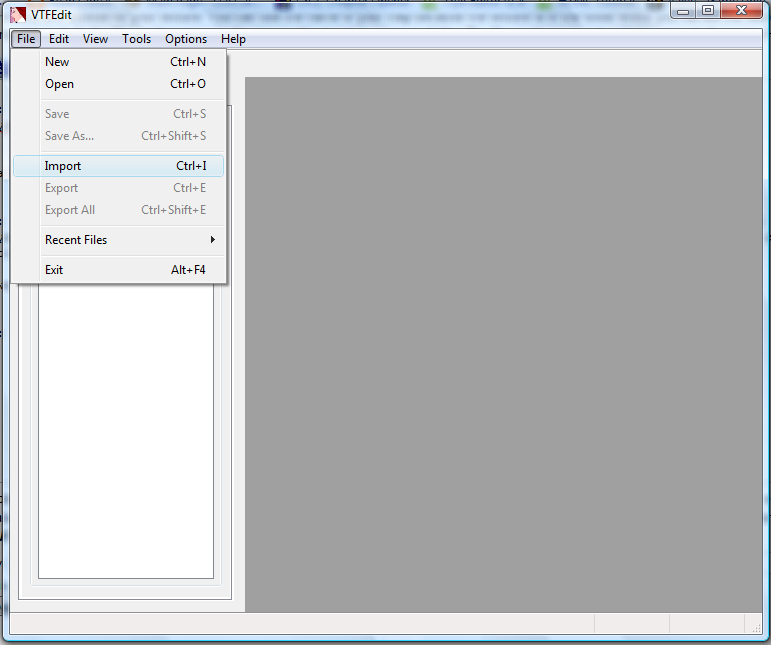
Click Import and browse to the Targa file and open it.
When you import it a box will open. Choose the options I have here:

Click OK and there will be a pause while it loads your image. This is normal.
Now save the VTF in the garrysmod/garrysmod/materials/mapname folder with the same name as the Targa and the blank text file.
Now we are done with the texture.
Creating the Material
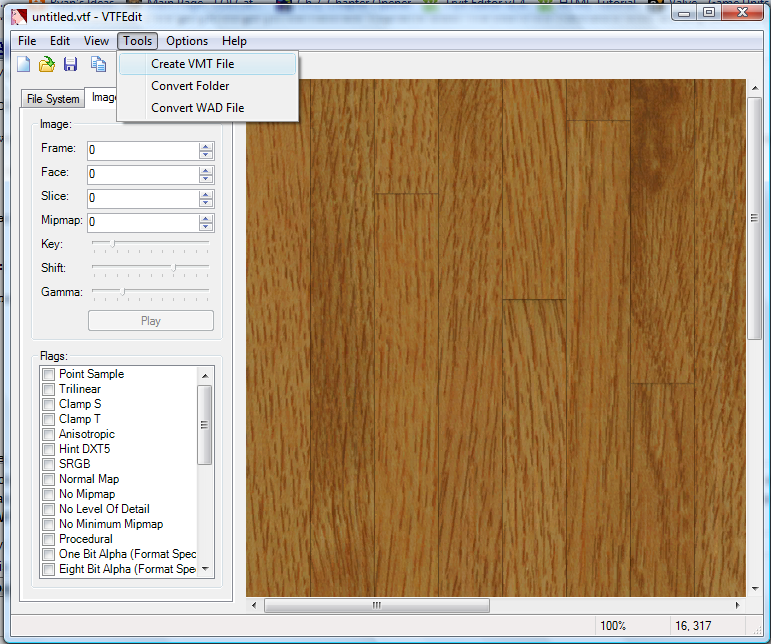
Step 6: Using VTFEdit create the VMT file or if you know how, write your own.
With the VTF open click Tools and click Create VMT.
A box will open. Choose the texture tab.
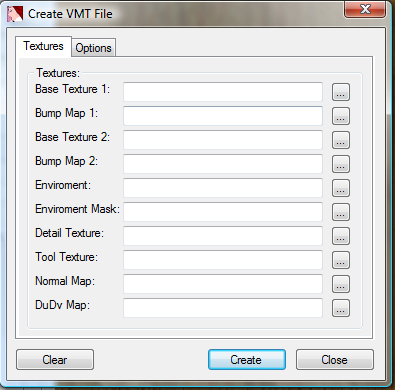
For base texture browse to the garrysmod/garrysmod/materials/mapname folder and choose the VTF you created.
Then choose the options tab.
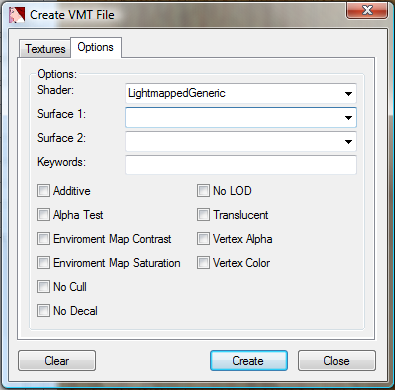
Don't worry about anything but the Surface 1 Choose the properties that would apply to your texture.
Click create and save the file in the garrysmod/garrysmod/materials/mapname folder with the same name as the Targa, blank text file, and VTF.
If you want to write your own VMT this is the syntax:
                    “LightmappedGeneric”
                    {
                    “$basetexture” “mapname/texturename”
                    “$surfaceprop” “surfaceproperties”
                    }
Wrapping it up
At this point you should have 4 files all called the same thing
     •	A Targa in the garrysmod/garrysmod/materials/mapname folder
     •	A empty txt file in the garrysmod/garrysmod/materials/mapname folder
     •	A VTF in the garrysmod/garrysmod/materials/mapname folder
     •	A VMT in the garrysmod/garrysmod/materials/mapname folder
If this is all correct start Source SDK and choose Garry’s Mod for the Current Game.* Launch Hammer and Browse for the name of your map. Because the files are all in a folder with the name of your map you should find it by searching the name.
When releasing your map you only need to include the VMT and VMF files in the garrysmod/garrysmod/materials/ mapname folder.
