Factory Items
From GMod Wiki
| This page has been nominated for deletion. Deletion is due within approximately 30 days from nomination, unless the deletion has been disputed on the talk page. See more pages nominated for deletion here. Reason for deletion: Not what Garry wants the wiki to be used for Last Edit was made on 11/16/2011 |
| This article is a stub. You can help the GMod Wiki by expanding it. |
Contents |
Engine Factory Tutorial
| Factory Items: Engine Factory Tutorial |
| Automatic Engine Factory- makes working engines | |
| dirtdiver | |
| | 21/04/11 |
| | - |
Requirements
- 1.Expression 2 and timer (included in the wiremod)
- 2.Stool turret - if you want to make a good factory-You need this!
- 3.Sensor tool
Construction
All you need is in the Video - [ http://www.youtube.com/watch?v=jg0oSxoecmA ]
Enjoy! -dirtdiver out!
| This article is a stub. You can help the GMod Wiki by expanding it. |
Secret Elevator
| Factory Items: Secret Elevator |
| An elevator that you enter and exit by going through a solid wall (will not kill you) | |
| mtsully17 | |
| | 3/17/10 |
| | - |
Requirements
1. phx3 is needed to make this
Construction
- Spawn 4 2x size phx3 plates and 1 1x size phx3 plate
- place 1x plate on the ground and weld the 2x plates to it that makes a wall block entrence on all sides
- next go to vehicles on your spawn menu and spawn a chair
- set the chair and one wall to no-collide put the chair through the wall and make sure a sliver of the bottom is sticking out
- go to the color tool and set everything to zero.
- now use the color tool on the chair NOT THE WALL
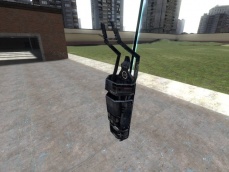
- spawn one can and weld it to the to the highest part of the wall the chair is in make sure you can clearly see the can
- now test it by going walking up to the struckture and crouching then press e
- if you get in the chair press e again and you should be ontop of the elevator (note make a contraption and putting it ontop will not make you go ontop of the contraption you will go IN it)
THAT'S IT!!
Spring Board
| Factory Items: Spring Board |
| An easy to make spring from which you can launch stuff (or yourself :D) | |
| ekee | |
| | 23 October 2009 |
| | - |
Requirements
1. A civilian door, any door will do as long as it is made of metal
2. Stacker tool
Construction
- Spawn a door
- Use the stacker tool to make about 7-8 more doors on top of the original one. Make sure that you are only welding them together and not freezing them
- Weld the bottomost door to the ground
THAT'S IT!!
To use the spring, use your Physgun to press the topmost door down to the bottomost door so that the rest of the doors are sandwiched in between and then freeze the topmost door in place. Put the object you want to launch on the topmost door and release it!
Dump Truck
| Factory Items: Dump Truck |
| A simple method to create a dump truck. | |
| Anonymous | |
| | Unknown |
| | - |
A simple method to create a dump truck might entail creating a car or other wheeled vehicle strong enough to support a blue dumpster. From here, a dumping mechanism can be made by first using ball joints on the rearmost corners of the dumpster, and using a muscle constraint, hover balls (probably the best choice), or other pushing mechanism to upend the container when ready.
A wired alternative would be to use a wire hydraulic along with some accumulators and gates for more precision.
Elevator
| Factory Items: Elevator |
| A simple elevator. | |
| AMT | |
| | 28 December 2006 |
| | - |
Introduction
This tutorial will explain how to create a simple, fairly stable, and easy to use elevator to transport yourself to different levels in the map.
Requirements
- 1 Pod Vehicle (Vehicles Tab > Pod)
 |
Construction
- Position the pod vertically using the Physics Gun and right-click to freeze it in place above the ground.
- Open up the Garry's Mod Menu (Q) and select the Slider tool. The default settings for this tool are fine.
- Create a slider from the center of the back of the pod, to the sky (or another prop). Make sure there is slight angle in the slider line so that it isn't completely vertical.
- Open up the Garry's Mod Menu (Q) and select the Winch tool. A low value for both the increase and decrease speed settings recommended. Use an easy to remember key combination to activate the Winch. The material and size of the Winch is completely up to you.
- Create a Winch from slightly above the center of the back of the pod, to the point where you created your Slider.
- Unfreeze the pod by left-clicking on it. Press the keys you setup in Step 4 to operate the elevator.
 Step 1 |
 Step 2 |
 Step 3 |
 Step 4 |
 Step 5 |
 Step 6 |
Customization
There you have it, a simple elevator created using only one object and three tools. Some additional things you might try are:
- Adding a second Winch from the back of the pod to the ground to keep the elevator from bouncing when in movement (this is caused by the elastic nature of the Winch).
- Creating an elevator for one of the buildings on freespace03.
- Creating buttons so others can use your elevator.
- Increasing or decreasing the speed of the Winch.
- Making the Slider completely vertical (although this may cause unwanted jiggling of the pod).
Crane
| Factory Items: Crane |
| A cool fully controllable crane! | |
| Overv | |
| | 26 January 2007 |
| | - |
Introduction
This tutorial will explain how to build a crane. First we build the crane, then we build the rotating system and after that the rope system. To lift things up and down.

Construction
- Create the "crane_frame.mdl" and the "crane_docks.mdl" objects by using the search tool in the Garry's Mod Menu.
- Place the crane_frame.mdl on the ground and freeze it with the right mouse button.
- Now freeze the crane_docks.mdl slightly above the ground (not as high as the crane_frame.mdl)
Rotate it so that it's upright.
- Open the Garry's Mod Menu and click on the motor tool. Use the keys you want for rotating the crane left and right. Now click on the bottom of the crane_docks.mdl (the one you placed in the air) And then click in the middle of platform of crane_frame.mdl. Now you've something like the screen. If everything went okay, you can't rotate your crane :P With your Physics Gun aim on the crane_frame.mdl and left click, so that you can move it, but don't do that! Now press R on your keyboard and click with the right mouse button. Now you can rotate your crane = D happy!
- Now we're going to create a rope, with the Winch tool, so that we can make it shorter and longer. Spawn a object like a ragdoll or a crate or something you want to hang at your crane. First click on the end of the crane (where the rope starts) and then click on the prop. Now you can rotate your crane and lift the prop up and down with the keypad.
- You're done!
Note: If you put a -5000 balloon on the back of crane_docks.mdl then it will balance it (you may need to add more weight if you are lifting something)
Customization
Unfortunately, for every new prop you hang at the crane, you've to repeat step 5. A few ideas for other uses of the crane:
- Create a crane car or train, to pick up props and move them long distances.
- Modifying the winch speed.
Crane 2
| Factory Items: Crane 2 |
| A cool fully controllable crane! | |
| EmperorEuan | |
| | 3 may 2009 |
| | - |
Edited by:
--PhyOS 17:43, 22 November 2009 (UTC)
Construction
- This is a fully functional crane that works. It has 2 arms that are linked together and controlled by xqm hydralics.
- Spawn a 4x4 plate in general construction props from PHX3 and freeze it.
- Now go to robotics and spawn a big mounting plate and a circle with connector on one side and using the motor tool with 10000 torque and no friction, attach it to the middle of the 4x4 plate. Then attach a hover-ball with friction step to 5. Then spawn what sized arms you want, but they have to have the same thing on each end (Use the axis tool to attach them together). Now you need to make a large piece, long enough to move the first arm. Weld this to the circular base with the hoverball.
- Now you need to set the wieghts. The base is set to 500000, the back arm (vertical one) 20000, the first arm 10000 and the second arm 5000.
Wiring
- First spawn wire hydralics and remember the length is on the controller.
- Then make an accumulator ( this can be found in gates, time0 and 2 subtract gates (found in arithmetic) and an adv. pod controller. WORKING!
